Tuesday, November 30, 2010

Keeping Secrets is HARD.

It's December.

Or at least, It will be tomorrow.....which means I am now fully immersed in Christmas present creation AND preparing for finals season of my first semester of grad school.  I know what you are thinking.
"Courtney, those things don't go well together at all!"  Oh yes they do, since sewing/crafting/cooking is my stress relieving activity of choice. I am getting so much done!! Unfortunately, I cannot tell you about what I am doing until after Christmas so that my friends and family don't get their Christmas surprises ruined by reading about them on internet.  All I can tell you so far is that I've sustained a minor glue gun burn and stabbed myself in the thigh with an embroidery needle (probably a direct result of watching a foreign film while working, which requires one to read subtitles)

Don't worry, though, faithful friends, because I have a few things tucked up my sleeve to share with you until December 25.

But first I've got to finish this paper.
Good Old Charlie Brown.  I should make some tree ornaments that look like that!

Wednesday, November 24, 2010

Crafts From The Past: Ending Cat Houselessness, Beginner Carpentry, and Miniature Anachronisms


This week is Thanksgiving, and I’m back at home. So, I thought it would be fun to recount some projects from my earlier days. 

Extreme Makeover: Cat Home Edition?

When I was 13 my family got two kittens.  They were sisters named Macy and Sedona.  After we’d had them for about a month I talked my Dad into helping me build a rather large house for them.  I even learned how to use a jigsaw and a table saw. I figured if dogs got houses, cats needed them too.  If this house was on the market, I think the ad would look something like this.
Macy surveys the view from her estate.  

HOUSE FOR SALE:  Two stories, with attic. Whimsical coloring.  Patio and deck. Small doorways.  Open floorplan. Hardwood floors.  2 bedrooms.  No bathroom. Litter box nearby.  Conveniently located 3 feet from restaurants “The Water Bowl” and “The Food Bowl”.  No stairs, just “openings”.  Not handicap accessible.  Good schools, friendly community. Great for a 2-cat family who loves to entertain.
Hey kid, get off my lawn!!

Don't look at me. Don't look me in the eyes.

I don't require stairs.

These days Macy lives in this big house alone because my poor little Sedona has gone on to her heavenly reward.   When we first built it, I called it The Cat House but I had to quickly change that to “The Feline Habitat” when my uncle kindly informed me of the negative connotations associated with the former.  Yikes.  This is a family-friendly establishment.

This Old House: Easy Roofing Solutions…for those who are afraid of heights.

One year for Christmas I got a completely wonderful Doll House.  Not a Barbie Beach House.  Not a Playschool Plastic Bowl Cut Family Doll House (you know what I’m talking about)…although I had one of those too. Not one of those “Loving Family” or whatever doll houses with the real working electrical fixtures and crib that sings songs.

No.

An honest-to-goodness, made of wood, built by my own mom and dad doll house.  It was probably the best Christmas present ever.  Materialistically speaking, of course.   Anyway.  I guess I was 9 or so.  My Dad built it, but I did ALL, and I mean ALL the painting myself.  My mom helped me with the roof.  You have to glue each shingle on by hand.  It’s pretty time-consuming.  So much so, in fact, that I never finished it.  Until yesterday, that is.  That’s right, dear readers.  For about 13 years the roof has been unfinished.  Way back when I was 9, for some reason I didn’t finish the very middle part of the roof, just a very little part.  Then the shingles got lost or something.   This week, I found them in the basement!  In the very stainless-steel mixing bowl I borrowed from the kitchen to hold them in 13 years ago!  So, I finished the roof, and repaired various pieces of furniture that had been broken over the years.  
You can see the maid through the front door.  That's right, they've got a maid!
Don't you wish your home overlooked a pool table? (and had no back?)

You may notice something strange about this house.  Something a little….not right.  No, it's not the creepy, glassy-eyed expressions of the non-bendable doll house people 10-year-old me choose from a doll house specialty store for the ridiculous price of 7.50 each (WHAT WAS I THINKING?) Maybe you would call them “glaring chronological errors” or “startling anachronisms”.  For example, the figurines appear to be dressed in some sort of Victorian fashion (1837-1901)….yet the kitchen floor is very 1950’s.  Also, it’s pretty amazing to have an electric stove…which was an exhibit at the World’s fair in 1893 so it seems pretty surprising for a family such as this to already have one. And that fridge?  Well, our little family here probably should have an “ice box” since refrigeration didn’t really catch on until the early 20th century.   Please also notice that this family has ONE OIL LAMP for their entire home. Now THAT is just wishful thinking.  I won’t continue.  You get the idea.  Clearly, 9-year-old me was not that concerned with constructing a historically accurate house.  Of course, I’m still not that worried about it, so I guess it’s okay. 

Here are a few rooms for your perusal.
The Kitchen. 
The Living Room.  My, doesn't she look like she is having a good time?
Mr. Head of Household checks himself out in the mirror.
9 year old me painted this room too look almost exactly like my room at home, minus the blob-butterflies.
What Victorian home would be complete without an ocean themed  school room?

I think I’m going to give the whole thing a nice coat of polyurethane to preserve it for posterity.  I mean, I feel like this is an heirloom-quality toy, you know?  Handle with care J

Saturday, November 13, 2010

Vera Bradley, Women’s Suffrage, and Pseudonyms

Vera Bradley, Women’s Suffrage, and Pseudonyms.

Pictures at the end!

Vera Bradley.

People seem to love it, or hate it.  I’m in the middle.  I like some.  I feel ambivalent towards some.  I feel very, very antagonistic towards the price tags of most.

Who/What is Vera Bradley, you ask? 

Well, here is what wikipedia has to say:
“ The company was founded in March 1982 by Patricia Polito Miller and Barbara Bradley Baekgaard, a 1962 graduate of Marymount College. Named after Baekgaard's mother the company got its start when both were inspired while awaiting a flight in Atlanta, where they noticed a "definite lack of feminine-looking luggage".[3]


The article also says that they are famous for “quilted cotton luggage, handbags, and accessories”.

Okay, Vera.  That’s a pretty good idea. Maybe not change-the-world good, but definitely make-it-easier-to-find-my-bag-at-the-airport good, and who knows what that could lead to?  I want my luggage to look feminine too.  Thank goodness I live in a time when I can vote and have feminine luggage. Imagine the super olden days, when I would have had to carry a “Portmanteau” or “valise” and blog ( I mean, write on parchment with a quill) under a man’s name, like Currer Bell.…except I would have had to pick a different name because Charlotte Bronte used that one. 

Yes, we are living in a very pleasant age. 

Anyway, I think I was talking about Vera Bradley.  I like some Vera Bradley things.  I have some friends that love this stuff and some that really, really don’t.  I have a several Vera Bradley bags, it’s true.  Somewhere in the neighborhood of 3.  Mostly thanks to my Aunt, who gave them to me. (Thanks!!!) I really do like them, they’re colorful and fun.  I actually had to retire one because I used it too much and it got a hole in it. However, the suggested retail prices of Vera Bradley products are CRAZY.  Like, get a student loan to pay for them CRAZY.  Okay, I’m exaggerating. I’m working on developing my own Vera Bradley inspired bag making method, and today I reveal to you my first attempt.

Ok so basically Vera Bradley bags, in general, are quilted cotton.  Machine quilted.  This is not difficult to do.  All you need is two pieces of fabric and some batting for in between. I’m betting there are several tutorials on how to do this out there on the net so I won’t go in to it that much.  My grandmother is an excellent quilter; I really need to improve my own skills a bit more.  The difficult part becomes making a bag pattern that will give you the desired shape.  Because this was my first attempt at a quilted bag, I chose something easy to replicate.
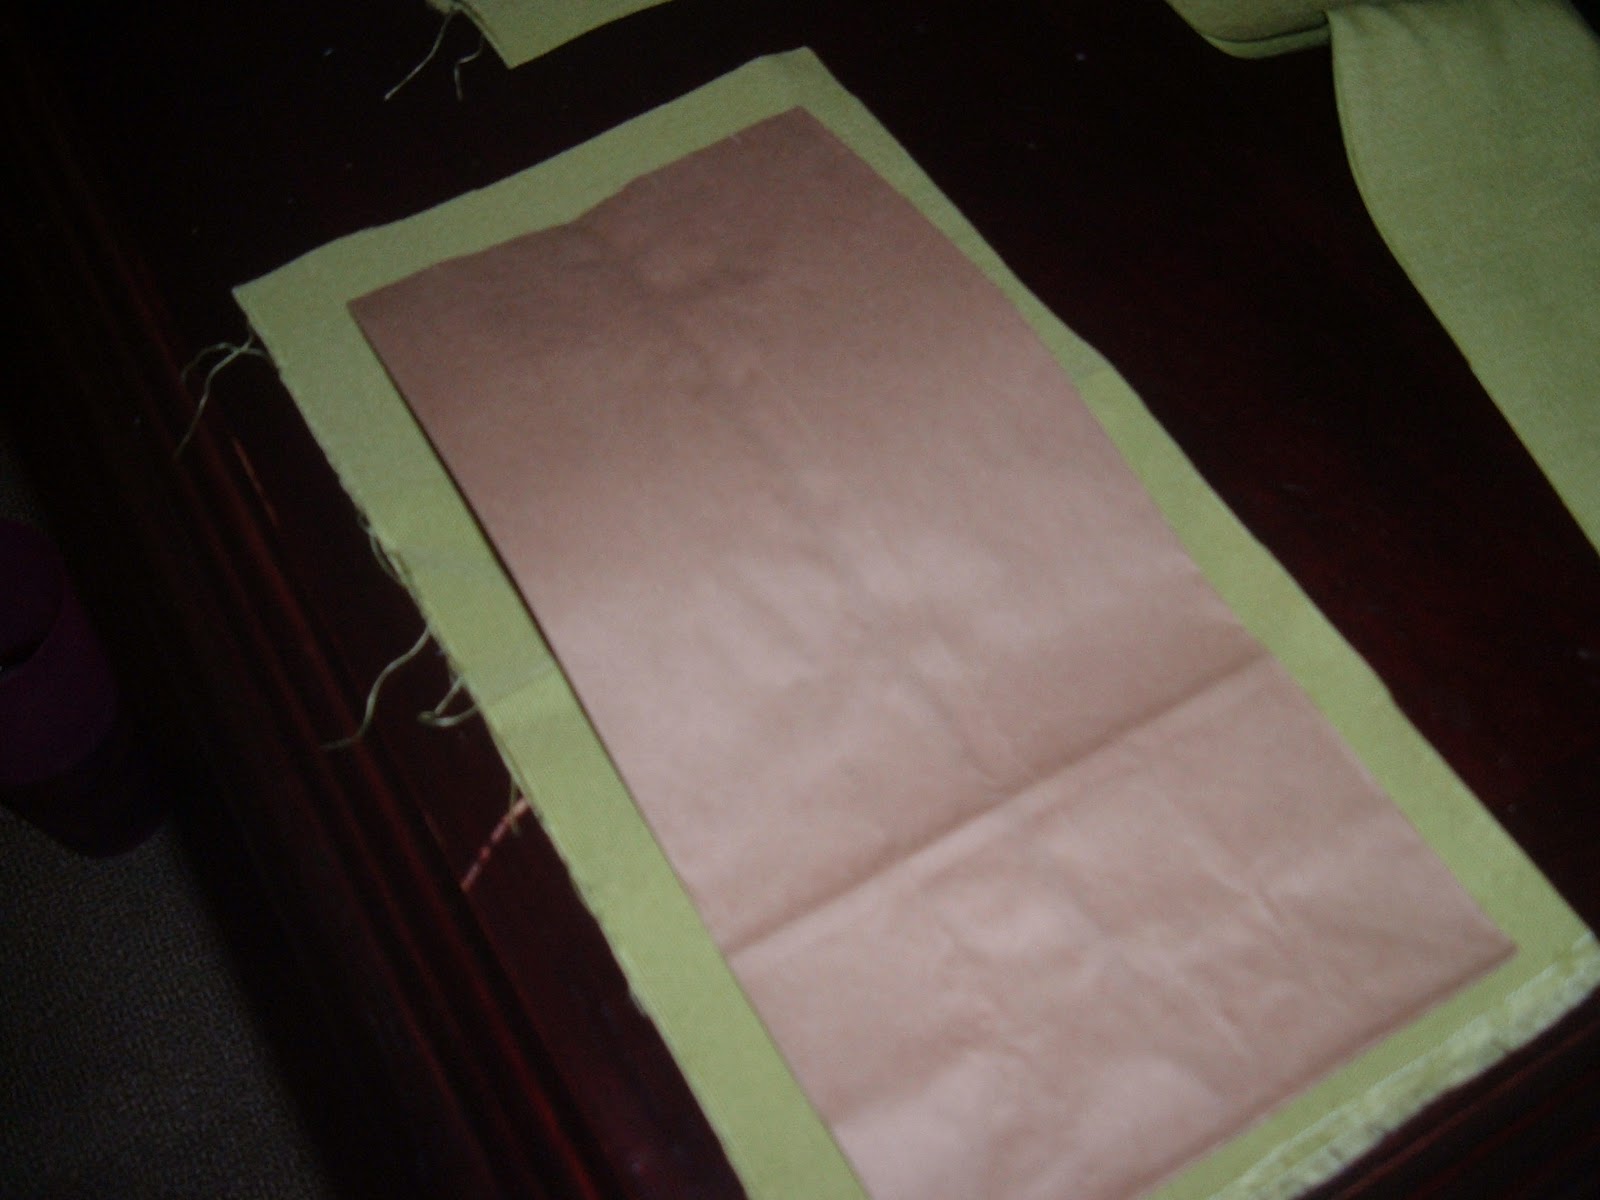
A paper sack.

Yes. That’s right.  I made a quilted-cotton version of a paper sack.

I chose a fun patterned fabric for my outside fabric and a weird scratchy, thick greenish fabric I picked up as a remnant at some fabric store a while back. I thought it would lend some structural support.  I used the paper sack as a pattern guide and cut out 1 bottom piece, 2 side pieces, and 2 front/back pieces from the 2 fabrics and the batting.  Then I made my “quilt sandwich” and pinned them together. I used my machine to quilt it, which I did a bit haphazardly, seeing as I didn’t measure or anything to make the lines even. Turned out pretty good! Then, using the trusty inside-out method, I sewed it all together to make the bag, taking care to fold over and hem the top.    Next time I’ll do it so the lining covers up the ugly inside parts, but this was a bit of a rush job because…..I was impatient. (The first step to recovery is admitting you have a problem) 
Paper Sack as a pattern!

mmmm Quilt Sandwich!

All my pieces, pinned and ready to sew.  Why are there two bottoms, you ask? Because I forgot what I was doing.

Horizontal....

And vertical.  Next time I will try more interesting patterns.

I am totally pleased with this first attempt. You have to start small.  I think I will attempt a tote bag next time, with a pretty lining and handles.  Also, I might put some cardboard or plastic somewhere it the bottom part to make it sit flat. It’s going to be awesome.  Oh! By the way, this entire little bag project probably cost about…umm…3 dollars or so. I had all the materials hanging around in my craft lair, so I’m really not exactly sure. 
Close up! Check out that highly geometrical quilting action!

It is the perfect size to use as a Shoe Travel Bag (Is that a thing?).  Don’t you hate it when you have to toss your shoes in your bag on top of all your non-shoe clothes?  I mean, you have no idea where the bottoms of your shoes have been, really.  Especially if you sleepwalk.
Home Sweet Home for my yellow peep-toe pumps?

Or, to hold a book. You know, in case….um.. I really have no idea why you’d need to use it for this. But it fits. You could really put anything in it you might put in a regular paper sack……….
Book Holder?

I hope Vera Bradley doesn’t think I’m trying to horn in on their profits.  It’s just little ol’ me…..trying to empower the world, one stitch at a time.

Saturday, November 6, 2010

Let There Be Light!

Let there be light!

It is better to light a candle than curse the darkness.  - Eleanor Roosevelt
All lit up!

I feel like every new project I do is my favorite one.  This one is no different.  I’ve been hinting at this for a while.  This one really can hardly even count as “making” something, it’s more like “assembling”.  Candles and candle holders are really surprisingly expensive, especially the pretty long-stemmed glass candle holders.  Don’t fret though, I have a less costly and equally beautiful solution for you.  I won’t pretend this is a totally novel idea; after I did this I saw that Real Simple magazine had done almost the exact same thing…..but I digress.   I found these really lovely little glasses at a thrift store for 50 cents each- I picked three different ones. They seem oddly small for wine glasses. Honestly, I don't really know what they are for.  Then, I got some small votive candles to put inside them. (1.50)  In case you’re counting, that’s a grand total of 3 dollars.   Wouldn’t this make a cute gift?  I don’t know where I will put mine yet, but I find them very charming.  
Now aren't they cute?

Wednesday, November 3, 2010

C'mon little plant, LIVE!

The winds of winter have begun to blow, and I moved the aforementioned poor little plant inside. Unfortunately, he doesn't seem to be adjusting to his new climate very well.  This plant story may not have a happy ending!  However, I refuse to give up on it!  By the way, stay tuned for some rather excellent recipes.  In the meantime, check out my friend Mary's blog : http://mary-made.blogspot.com/