Sunday, January 1, 2012

The Circle of Life (of T-Shirts)


I didn’t post in December at all.  I was on sabbatical in Brazil, living in the rain forest among toucans and those giant sloths you see in National Geographic. Just kidding.  I was just busy. I did, however, find time to get a little crafty with some old t-shirts before heading home for the holidays. 

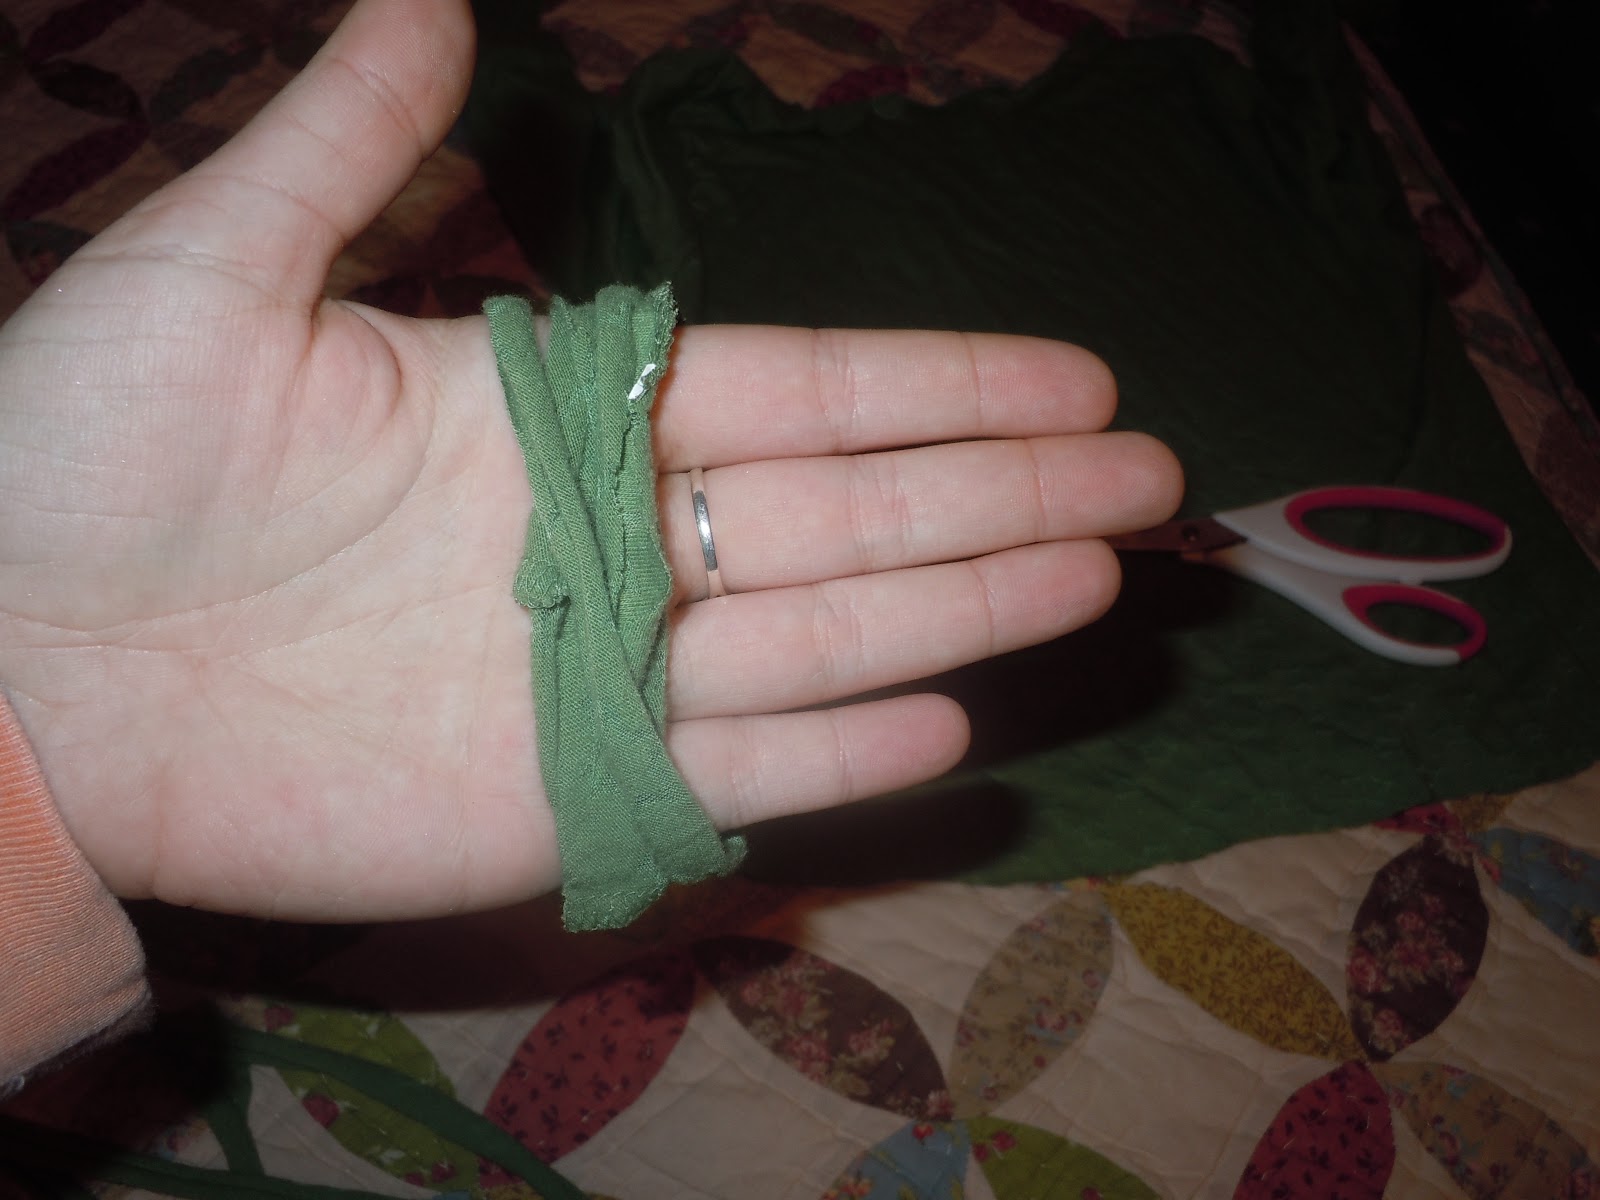
This first little bit of fun is yet another fabric flower, good for a pin, hair clip, or perhaps as a bunch in a vase.  All you need is an old t-shirt and some scissors!  Basically, you just cut strips, pull them so they get curly on the edges, wrap around your hand, tie a strip around the middle, and cut the loops on both sides.

The previous sentence is an example of how to maximize comma usage.
Cut

Pull

Wrap

Tie

Cut


I seem to be in a craft rut of making scarves and flowers, so for our next feature....a scarf!  My mom saw these on pinterest and she made me a green one.  I liked it so much I made a gray one too!  They are very easy to make.  Just cut off the bottom of a t-shirt (maybe about a foot of shirt), cut off the hem, and then cut strips to about halfway. It’s hip, it’s happening, it’s now.  I’m not saying you should wear it to a fancy dinner, but to the video store? Sure. I find that the relative hipsterness of my apparel is positively correlated with the talkativeness of the video store employees.  


Friday, November 18, 2011

Ribbon Bookmarks


This a great quick, easy project! It would make a great little Christmas gift or hostess gift (for a hostess who likes to  read, at least.) if you bought a journal and made a ribbon bookmark to match. I spotted this on Pinterest in the  DIY/crafts section (and quickly repinned it J).  I won’t go into too much detail with the how-to because Percolating Projects has a reallynice tutorial, so click on the link for the step by step! 

All you need are buttons, ribbons, and hair elastics (which I usually just call "hair things" but let us be fancy for the blog).  The only thing I did differently was use my hot glue gun for everything except sewing on the button, which I did by hand.  I just didn’t feel like getting out my machine for a few bookmarks (Crafter’s Lethargy takes another victim!) I made one for my journal, my Bible, and my slightly smaller Bible.
So Easy

So Cute

Of course, now that I have my beloved Kindle I don’t have as much need for bookmarks…but I’m not completely electronic yet, and probably never will be.


Happy Crafting!

Thursday, November 3, 2011

A Student Staple Revisited: Ramen Shrimp Pouches


I wish some of the pretty scallions had made it into this shot.


Last week I made Ramen Shrimp Pouches for dinner (That is a weird name. I don’t relish having the word “pouch” on my menu).  It’s Alton Brown’s recipe, and you know how I feel about Alton Brown. 

Oh? You don’t? 

I think Alton Brown is great.  Really great.  He is hilarious, snarky, and science-loving. When ridiculous stuff happens on Food Network, he calls it like it is.  He was the speaker at my college graduation (a darn good speaker, ask anyone).  He’s from Georgia.  He went to UGA…..and apparently he’s friends with a friend of my Dad, which means I am 3 degrees away from Alton Brown (I don’t know what my Kevin Bacon Number is, though, and I don’t really care. Unless Alton Brown knows Kevin Bacon, and then my Kevin Bacon Number is 4.)

Back to the important part! The food. 

The recipe tells you to make pouches with foil and then you stack up all the delish ingredients in there, add the broth and seasonings, and then cook them in the oven for a little while. 

I didn’t follow the good Mr. Brown’s recipe exactly, because I was shopping at Kroger and they just didn’t have all the ingredients.  It still tasted pretty good, though, so…high five!

I didn’t have mirin, which is a kind of rice wine, so…I just added a shake of rice vinegar.  I fully understand this is not the same thing.  But it was something I had, and it had the word rice in it, and you can make vinegar out of wine so….I know. Still not the same thing.  Also, there were no dried mushrooms at Kroger, so I used non-dried ones.  There. That’s all.  Not so bad, huh? Everything else was by the book.


My roomies seemed to enjoy it, even though Jessica is not a shrimp fan. (Which is fine, because Sammy and I just ate her shrimp for her)

I give it an A plus, but not for folks on a low-salt diet. It’s quite salty.  Stay away, my hypertensive friends! Or at least use low sodium soy sauce and broth…and maybe less soy sauce.

PS- I just joined Pinterest and Twitter.  What?! I’m having a pretty good time on there.  Join me. Or follow me. Or pin with me. I haven’t quite figured out the proper verbs to use.

Friday, October 28, 2011

4 dollars, 3 yards, 2 scarves, 1 hour


4 Dollars, 3 Yards, 2 Scarves, 1 Hour

Facts: The title of this post is slightly misleading.  I actually spent 4.50 on the fabric, but it didn’t look as snappy when the title was “4.5 Dollars, 3 Yards, 2 Scarves, 1 Hour.” You understand.

Fall is here, and winter is coming! That means scarves! Actually, these days we seem to wear scarves any old time, even the summer.  I’m sort of hot-natured though, so I can only wear fashionable lightweight summer scarves when it is decidedly cool.  I make a lot of scarves, and things with birds on them. I should probably branch out.  The fact is, though, that scarves are one of my favorite “quicker” projects (as long as you aren’t knitting it) and when your life is filled with words like “thesis” , “master’s degree”, and “graduating on time” sometimes you can't spend as much time on your hobbies as you might like.

You folks know I have a hard time passing up a good fabric deal. So, when I found this awesome, light, sort of chiffon-esque fabric on the 1.50/yd rack, I got 3 yards.  The friendly saleslady suggested I make a nice blouse, but I felt like wearing this rather loud pattern ALL over the top half of my body would make me look sort of crazy. So, I decided to make a scarf! At first I was going to use my sewing machine to hem my scarf, but this fabric was kind of slippery and my folds kept unfolding.  So, I remembered my edge-burning method from my chiffon flowers and decided to singe the edges to prevent frays.  I think this was a pretty good decision because it eliminated a bulky hem on a delicate fabric.

First, I wanted to make a square scarf, so I folded the edge of the 3yds down into a triangle and cut along the line to make a square.  You know, like you used to in school when you had a rectangular piece of paper and you needed a square to make one of those foldy fortune teller doo-dads.  I wanted it to be a square so I could fold it into a triangle and wear it like..um..I am uncertain what this method of scarf-wearing is called…a neckerchief?  That doesn’t sound right.  I’m going to leave you with a picture, and hope you know what I mean.  For the second scarf, I just used the remaining long triangle, which was slightly less than 2 yds.  I singed all the unfinished edges, and DONE.  I kept one for myself, and gave the other to my dearly beloved friend/roommate, Sammy.
Photography by Sammy!
What IS that?

Self-timer fail.

Monday, September 19, 2011

This and That

My blog photography *might* get better soon, because I read THIS.

I'm going to make THESE candy corn cookies in October, because they are so cute and probably taste 150% better than actual candy corn.

Fellow crafters, you should check out Craft Gossip.


Thursday, September 15, 2011

Chorizo Pasta Bake


Do you ever watch Chopped? I do.  Well, I do when I visit home; because my roomies and I are cable-free (not because we are TV snobs, but because with a combination of Netflix, Hulu, and ESPN online we can see almost everything we want, albeit on a small screen sometimes.)  On Chopped there is always some poor chef who doesn’t devein his shrimp or something and the judges say things like “I can’t believe this.  This is shocking. How could you not devein your shrimp?” as though it is the worst thing a human could possibly overlook.  I guess if you are a professional chef it is a big deal that you didn’t devein your shrimp.  However, I have the luxury of being a semi-regular person, and I have failed to devein my shrimp before.  I mean, if I was serving shrimp at a fancy party or making shrimp creole on Christmas Eve (which is a tradition in my family) I would definitely devein them.  But for a low county boil? A meal which is often eaten OFF OF NEWSPAPER? No. I am not deveining shrimp for that.  Consider it my rebellious return to nature (I like camping, but I’ve never been “primitive” camping).  

I think the point I was trying to make, but in fact was aimlessly circling around in the above paragraph is that I am not a chef so if I went on Chopped I would probably lose. I perhaps know more than the average bear about food/cooking (I’m not actually comparing myself to a sentient bear.  That was a Yogi Bear reference and I got scared no one would get it.  He’s “smarter than the average bear,” remember?) because I double majored in “dietetics” (which to many people sounds like “not eating anything good ever” but does not mean that) and “consumer foods” (when I tell people this they say “consuming foods? I could do that!” and then we all laugh but that isn’t what that means either) in undergrad and am currently attempting to become a “MASTER OF SCIENCE!” in “foods and nutrition”.

Please accept my humble apologies for my excessive use of parentheses and quotation marks. The internet is a wild, unregulated place.

Back to chorizo.

Chorizo is pretty yummy.  According to my copy of The Prentice Hall Dictionary of Culinary Arts it is “a Mexican sausage made from fresh pork, seasoned with garlic and powdered chilies, usually cooked without the casing” or “a Spanish sausage made from smoked pork, seasoned with garlic and powdered chilies, usually cooked without the casing”

We will be operating with definition 1 for the duration of this post.

As I said before, it is a pretty tasty food, especially if you are a fan of pork (yes) and spicy things (also yes).  Like most sausages, it tends to be rather high in fat, which is why it’s nice to use it as more of a flavoring type ingredient instead of a star-of-show kind of thing sometimes.

Court’s Chorizo Pasta Bake
This is my new favorite casserole dish. The lid (to the right) is also a PIE PLATE!)
Servings: 6 
14.5 oz Whole Wheat Penne (aka a box of penne)
1 can Rotel tomatoes & chilies
2.5 oz chorizo (2 links out of a 6-link package, in my case)
2 cups red/green/yellow bell peppers
½ c onions, chopped
1 T garlic
2 cups jack/cheddar cheese, shredded
Cook pasta, drain, set aside.  Cook the chorizo and garlic in a nice big frying pan, then add the peppers, onions, and Rotel and let things simmer for a while, about 10 minutes.  Layer the pasta, vegetable/chorizo mixture, and cheese in a casserole dish in whatever order pleases you, but make sure you come out with a layer of cheese on top for added melted-cheese beauty.  Bake at 350 for 20 minutes.  Put some foil on top if your cheese gets too brown!   
The judges on Chopped would probably give me  negative points for "plating," I'm afraid.
Nutrition Facts! Thanks to caloriecount.com

Side notes:

I’ve been looking at Regretsy a lot this week. As a crafter, I find these craft-misadventures sometimes hilarious and sometimes horrifying.
I just arranged for dictionary.com to send me the word of the day via text everyday! How awesome is that?  Also, you should play Word Dynamo on there! Love it.

Friday, September 9, 2011

Chiffon Part Deux: Let it Burn

and other things.

 A while ago I posted about some chiffon flower hairclips I’d made (Check it out here). I had picked up a whole yard of chiffon in the remnant bin at Hobby Lobby.  I think it’s weird to call an entire yard a remnant.  I thought the whole point of a remnant was that it was less fabric than anyone would conceivably want to purchase, which is why most remnants are less than a yard.  It’s not like Hobby Lobby is selling chiffon in great quantities.  Oh well, I shouldn’t complain, because I got it for half-price since it was a “remnant”.  After making the two aforementioned flowers, I had quite a bit of fabric left. Not enough to make any clothing, of course (besides, I don’t have a serger and chiffon looks sad when you hem it the regular way).

I made another flower with the remaining selvage-side, like last time.
Expect the photography to go downhill from here, okay?
And yes, I totally got this sweater at target. 


And then I thought “I must seek out a new, more challenging method!”

With this method, you cut out somewhat concentric, somewhat circular shapes and then burn the edges with a lighter until they curl up a little.
Concentric Circles!

I don’t usually bring fire into my craft projects.  Hot glue? Sure.  But fire? That seems a little risky.

Cut to me, sitting cross-legged on my bathmat, holding a piece of chiffon in one hand and my super cool 3-way candle lighter in the other, tentatively touching the flame to the fabric all while learning over the bathtub, which I’d partially filled with water in the event that everything caught fire and I had to drop it.

It all went very well, really.  I only had to blow out tiny little fires once or twice and the precautionary bathtub of water was quite unnecessary.
I really need to take a photography class or something.  

The first flower I tried was small, cream-colored, and I used a button for the center. (I attached the layers with a few small stitches prior to adding the button)  For the second flower I was feeling a bit more adventurous (more adventurous than FIRE, you ask?), so I pulled out my watercolors and painted the chiffon before burning (singeing?) the edges.  I fixed the layers together with fabric glue this time and left off the button. (but I did put a cute little bird holding a letter in the middle)  For both of them, I glued a felt circle to the back before adding a hairpin/regular pin
Painted Concentric Circles!
It looks better in person. I hope.

I’ve still got a fair amount of chiffon left….so….let me know if you’re in need of trendy accessories.

AND NOW FOR MORE THINGS!

Hey, I was on a kick today, and I couldn’t stop.  I finished up (almost) all my schoolwork like a good girl so I could enjoy (almost) all the weekend, so as soon as I got home I reached for my sewing box. What’s that? You’re laughing at me for spending my Friday afternoon sewing? Well, whatever.  We all have our things.

Here’s some more pins and clips made with the leftover fabric from my Scottish Hipster shirt.  
Also, I finally broke down the steps for how to make this kind of flower- and they are as follows:
  1. Cut out a circle
  2. Fold the edge over ever so slightly, and do a basting type stitch along the folded over edge.
  3.  Pull tightly and gather.
  4. Sort of push it into shape, and tack it down with a few stitches.
  5. Add a button. Or don’t. I just like to add a button.


I love these sweet little flowers, I use them in projects all the time.  Like this shirt I made last summer:
"Hey, Take a picture like I'm just casually sitting here" "But you are just casually sitting there" 


AND NOW THE LAST THING

I bought some new stamps the other day, further expanding my custom-stationary horizons.  How precious are these birds?