Showing posts with label Sewing. Show all posts

Tuesday, April 2, 2013

Fit to be Tied (Bow tie DIY !)


My most dedicated readers (most likely my roommates/close friends/cousins/mother) will recall how I have lamented (regrettably, in video format, and on this very blog) how difficult it is to sew/craft things for gentlemen. Well, now I’ve at least got one more thing I can make for the fashion-forward gentleman, thanks to my friend Josh who a few weeks ago said “Can we make a bow tie this weekend?”  YES. YES WE CAN. Oh, I’m sorry was that caps lock? I just get so excited when people want to be crafty.

I used the pattern from this website and it worked pretty well.  After I made the blue bow tie per Josh’s request I was on a sewing kick, you know? Once I start I'd better just ride it out and see how much I get done (plus I was on break that week so I had some TIME! (not the magazine. and yes I am using parentheses inside parentheses. I do enough formal writing elsewhere)).   I had some pink gingham in my fabric stash and I thought that would make an awfully nice looking bow tie so I whipped that one up pretty fast….and then I made two more (navy with white polka dots) for my Dad and brother, but I don’t have any pictures of them in theirs yet because I haven’t been able to get them to try them on yet…. so I can’t sew the final two pieces together. My brother says he’s excited to wear it though, which coming from my brother means a lot because I don’t think I’ve ever heard him say anything like “excited” in a sentence about clothes. Growing up he usually just said "stop trying to tell me what to wear!" Bless you, Carter, for putting up with my many suggestions...and for following them that one time I got you those shirts from Old Navy in high school...and a million points to me for picking out that windbreaker you wear all the time. Just kidding....but I digress. 

For the first bow tie I followed the instructions exactly, but for the second one I went off-book because the first bow tie was kind of stiff and when I clipped close to the seams it ended up with some funny thready spots that I had to fix (and then they bothered me A LOT (Sorry Josh)).  For the second tie (the pink one), I only used interfacing on one side of the tie, not both.  That way it was a little less stiff, and I think it turned out better. I also didn’t clip the excess at all; ¼ seam allowance is pretty small to begin with.  
pattern

pin it, cut it out


fusible interfacing, which I usually hate because it itches but in this situation it is all covered up so it can't


Turn it right side out!


Honestly, the hardest part was turning them right-side-out.  I could have made them so much faster if it weren’t for that part. Be patient or you might poke through a seam or nick your fabric if you use tweezers or something to pull it out.  Make sure to poke the corners with a chopstick so they look nice and sharp.

So there. A not girly sewing project.

"Hello, my name is Josh. Ask me about my bowtie"

I had this normal picture of this bowtie and Josh but then I was like "How about that one with your adorable nephew instead?"

I mean, come on.  Way to be an uncle.

Wait...Josh...where are you in this picture?


OH WAIT I ALMOST FORGOT!!!

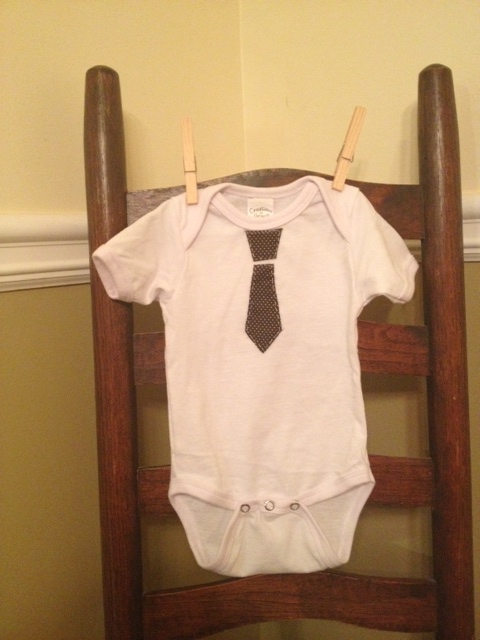
I was still sewing along happily when I remembered I’m about to be an Aunt (again!). Yep, my little nephew Joseph is supposed to arrive sometime in June.  Of course I had to make him something too, right?  Ta-da! Onesie with a tie appliqué ! I should make him a bow tie one too.
awwwwwwwwwwwwwwwwww can't wait to meet you little nephew


Monday, January 10, 2011

Snowbirds


“Snowbirds” often refers to folks who flee to warmer climates to escape the chilly months of their more permanent homes. In this case, however, it refers to birds who are in the snow.

Last night, to borrow a phrase from a friend, Narnia exploded where I live.  For those of you who aren’t as Chronicles of Narnia oriented as myself, that means it snowed.  It snowed quite a lot, really, and way down south here in the land of cotton (which is the number 2 agricultural export according to a USDA 2009 fact sheet, so I suppose we should be the land of broilers, which is the number 1 export.  That means chicken, by the way.)  that is a BIG DEAL.  I enjoyed playing in the snow this morning, took care of the necessary academic responsibilities, and have now settled down to update my little corner of the internet.  

It was so much fun watching the birds in the snow this morning.  It’s so much easier to see them when everything is white.  Our porch was visited this morning by Mr. and Mrs. Cardinal, and they looked quite stunning.  I do feel a bit sorry for Mrs. Cardinal, whose plumage is not as bright as Mr. Cardinal. However, in the bird world, it seems to be the males who are responsible for dressing up all fancy and drawing attention. Go figure. I guess that’s good for Mrs. Cardinal, she gets to wear sweatpants all the time if she feels like it.  Anyway, the birds inspired me to share with you another project I worked on for Christmas. It’s kind of perfect, because this project was inspired by a BIRD in the SNOW!  This one was for my Mom, who has a love of birdhouses (If you ever come to my family home, you could practically play Where’s Waldo with the birdhouses.  There is at least one in almost every room). In keeping with a bird-oriented theme, I made her this little…um…I don’t know what to call it.  Let’s just go with “art”. I would detail the steps for you, but I think it’s fairly self-explanatory.  I LOVE crafts with birds, I think. Looking over some of my past crafts, BIRDS and TEAPOTS seem to be my number one muses.  That’s sort of unusual.
Chirp Chirp.

This is an unrelated picture of my dog on a day when it was not snowing.

Thursday, January 6, 2011

Starry Night: Or, How to Re-imagine a famous Van Gogh using flannel and polka dots.

Starry Night: Or, How to Re-imagine a famous Van Gogh using flannel and polka dots.

Or, more accurately:

A Flannel Reverse-Appliqué Baby Blanket.
Little House, anyone?  Call me half-pint.
 (more pictures as you go, I promise)
I am about to become an Aunt (That’s pronounced “Ant” by, the way.  I have little interest in being an “awuhnt”, and a lot of interest in being able to lift 10 to 50 times my body weight)  So, for Christmas this year I decided to make my brother, sister-in-law, and future niece this cuddly-soft blanket.

Last year my friend Mary introduced me to the world of reverse appliqué via a book she had called The Alabama Stitch Book.  We made super cute reverse appliqué over-the-arm pincushions out of old T-shirts.  I liked the concept of reverse appliqué so much I decided to employ this technique on a blanket.  

So, I got 2 yards of red flannel and one yard of red cotton with white polka dots.  I took one yard of the red flannel and laid the red polka dots beneath it (right side to wrong side) and quickly stitched them together around the sides with my machine to make it easier to work with.  Then, I drew stars on with chalk, using a stencil I made, and free-handed a sweet moon sliver in the corner. 

Now comes the epically time consuming part.

Using extra-thick white thread doubled over on it self (to make it thicker and stronger) I stitched around all my chalk lines by hand.  I used an embroidery hoop to keep the fabric taut while I worked.  It did take quite a while.  I tried to do one or two stars everyday so as to not get burnt out, but if I happened to be watching a movie or something I would do quite a few (which is how I stabbed myself in the leg with an embroidery needle whilst watching a French movie with subtitles).  After I stitched all around a shape, I would tie off the thread and clip it.  

Now comes the joyful, liberating, and fun part.

Grasping my sewing scissors (more accurately, my mom’s which I have been borrowing for lo these many years, time to get my own because she took them back over Christmas for her own use! Can you believe it?) I carefully cut out the inside of the stars, not too close to the thread so as to not unravel the whole project.  That part is the most fun, because it’s much quicker, and so rewarding to see the polka dots peeking out.
I'm a star, I'm on top, somebody bring me some haaaammmm! (liz lemon, of course)

After I finished all the stars and moon, I took the other yard of red flannel and sewed it to the other to layers around the edged, right side to right side like you would a pillow, leaving a little hole to pull it through and make it no longer inside-out.  Then I stitched up the little pull through hole and used more of my extra-thick white thread to stitch a decorative little border around the edges.  
I hate it when carpet gets in my pictures. Oh well.

See, this way the front side is pretty and could possibly be interpreted as a flannel interpretation of “Starry Night” (which it really wasn’t intended to be, that is totally just a joke, for the record.  I don’t aspire to replicate Van Gogh in flannel quite yet), while the back side is just flannel and feels oh-so-soft to little baby’s rosy cheek.
Now comes the joy of giving part!

I gave this blankie to my brother and sister-in-law, and they seemed quite pleased.  Hopefully years from now, my little niece will be all cuddly and warm in bed with it one night and think “Wow, my Aunt Courtney loves me bunches” and not “Good grief, this is very folksy.  We young people these days are into hologram blankets, you know.  Where’s my hover dog?  Of course, even if she does think that and has a hover dog, I’ll probably have moved on to actually making hologram blankets by then, because goodness knows I’m very hip and with it. 
Ant not Awuhnt

Saturday, November 13, 2010

Vera Bradley, Women’s Suffrage, and Pseudonyms

Vera Bradley, Women’s Suffrage, and Pseudonyms.

Pictures at the end!

Vera Bradley.

People seem to love it, or hate it.  I’m in the middle.  I like some.  I feel ambivalent towards some.  I feel very, very antagonistic towards the price tags of most.

Who/What is Vera Bradley, you ask? 

Well, here is what wikipedia has to say:
“ The company was founded in March 1982 by Patricia Polito Miller and Barbara Bradley Baekgaard, a 1962 graduate of Marymount College. Named after Baekgaard's mother the company got its start when both were inspired while awaiting a flight in Atlanta, where they noticed a "definite lack of feminine-looking luggage".[3]”


The article also says that they are famous for “quilted cotton luggage, handbags, and accessories”.

Okay, Vera.  That’s a pretty good idea. Maybe not change-the-world good, but definitely make-it-easier-to-find-my-bag-at-the-airport good, and who knows what that could lead to?  I want my luggage to look feminine too.  Thank goodness I live in a time when I can vote and have feminine luggage. Imagine the super olden days, when I would have had to carry a “Portmanteau” or “valise” and blog ( I mean, write on parchment with a quill) under a man’s name, like Currer Bell.…except I would have had to pick a different name because Charlotte Bronte used that one. 

Yes, we are living in a very pleasant age. 

Anyway, I think I was talking about Vera Bradley.  I like some Vera Bradley things.  I have some friends that love this stuff and some that really, really don’t.  I have a several Vera Bradley bags, it’s true.  Somewhere in the neighborhood of 3.  Mostly thanks to my Aunt, who gave them to me. (Thanks!!!) I really do like them, they’re colorful and fun.  I actually had to retire one because I used it too much and it got a hole in it. However, the suggested retail prices of Vera Bradley products are CRAZY.  Like, get a student loan to pay for them CRAZY.  Okay, I’m exaggerating. I’m working on developing my own Vera Bradley inspired bag making method, and today I reveal to you my first attempt.

Ok so basically Vera Bradley bags, in general, are quilted cotton.  Machine quilted.  This is not difficult to do.  All you need is two pieces of fabric and some batting for in between. I’m betting there are several tutorials on how to do this out there on the net so I won’t go in to it that much.  My grandmother is an excellent quilter; I really need to improve my own skills a bit more.  The difficult part becomes making a bag pattern that will give you the desired shape.  Because this was my first attempt at a quilted bag, I chose something easy to replicate.

A paper sack.

Yes. That’s right.  I made a quilted-cotton version of a paper sack.

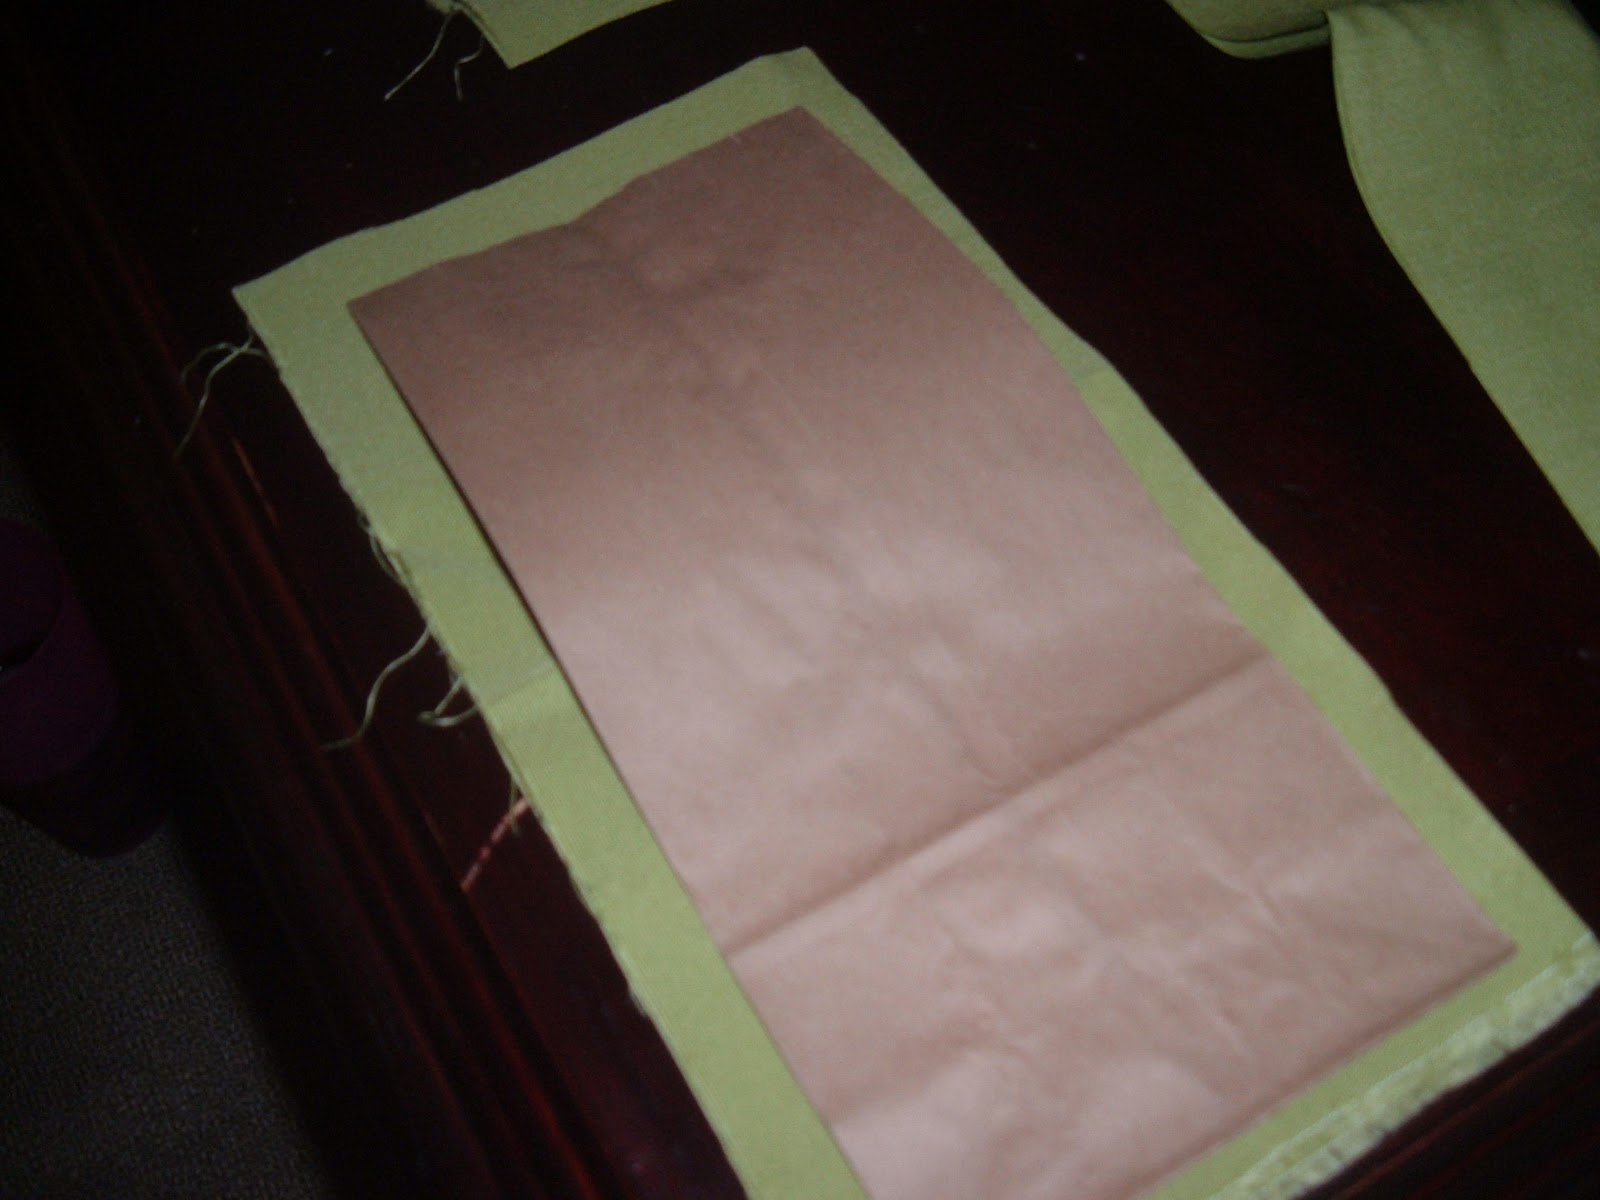
I chose a fun patterned fabric for my outside fabric and a weird scratchy, thick greenish fabric I picked up as a remnant at some fabric store a while back. I thought it would lend some structural support.  I used the paper sack as a pattern guide and cut out 1 bottom piece, 2 side pieces, and 2 front/back pieces from the 2 fabrics and the batting.  Then I made my “quilt sandwich” and pinned them together. I used my machine to quilt it, which I did a bit haphazardly, seeing as I didn’t measure or anything to make the lines even. Turned out pretty good! Then, using the trusty inside-out method, I sewed it all together to make the bag, taking care to fold over and hem the top.    Next time I’ll do it so the lining covers up the ugly inside parts, but this was a bit of a rush job because…..I was impatient. (The first step to recovery is admitting you have a problem) 
Paper Sack as a pattern!

mmmm Quilt Sandwich!

All my pieces, pinned and ready to sew.  Why are there two bottoms, you ask? Because I forgot what I was doing.

Horizontal....

And vertical.  Next time I will try more interesting patterns.

I am totally pleased with this first attempt. You have to start small.  I think I will attempt a tote bag next time, with a pretty lining and handles.  Also, I might put some cardboard or plastic somewhere it the bottom part to make it sit flat. It’s going to be awesome.  Oh! By the way, this entire little bag project probably cost about…umm…3 dollars or so. I had all the materials hanging around in my craft lair, so I’m really not exactly sure. 
Close up! Check out that highly geometrical quilting action!

It is the perfect size to use as a Shoe Travel Bag (Is that a thing?).  Don’t you hate it when you have to toss your shoes in your bag on top of all your non-shoe clothes?  I mean, you have no idea where the bottoms of your shoes have been, really.  Especially if you sleepwalk.
Home Sweet Home for my yellow peep-toe pumps?

Or, to hold a book. You know, in case….um.. I really have no idea why you’d need to use it for this. But it fits. You could really put anything in it you might put in a regular paper sack……….
Book Holder?

I hope Vera Bradley doesn’t think I’m trying to horn in on their profits.  It’s just little ol’ me…..trying to empower the world, one stitch at a time.